A little over a year ago I wrote up a tutorial on how to visually highlight blocked work items on a sprint board for Visual Studio Team Services. VSTS re-branded as Azure DevOps soon after I published that post and so some of the UI instructions have changed slightly now. I decided to make a follow up that runs through the exact same procedure but under the newer Azure DevOps re-branded UI.
Visually highlighting blocked work items is great way for developers, PMs, and the product owner to glance at the board to see blockers without having to deep dive into work items or run extra queries. Read on to find out how it’s done.
March 2021 Update: You can also use this technique for highlighting overdue items, tutorial here.
What is blocked work?
In a scrum or agile setting, “blocked” is the state of a work item that you cannot complete due to external factors. For example, you cannot add a feature because you are waiting for a co-worker to finish an outstanding pull request that your work builds upon. Or you cannot complete a user story because you are waiting on another department to provide a license to a 3rd party API.
It’s helpful for engineers, PM, and the product owner to identify and resolve blocked work quickly so the sprint can continue. The problem today is that in the default view of an Azure DevOps sprint board, you can’t tell if anything is blocked without diving into each work item or running queries.
Updating your view to see blocked work
There are some changes you can make to your Azure DevOps process definition and sprint board styles that allow you to visualize blocked work. It doesn’t require installing any extensions either. There are two phases to the process: modify your work item templates and adding custom style rules.
Note: performing these updates requires Project Collection Administrator access in your Azure DevOps project (or have Allow permissions to edit processes).
Step 1: Add a Blocked field to your work items
1. Find your project level settings. In the project sidebar in Azure DevOps, it can be found at the very bottom as Project settings with a little gear icon.
2. On the Overview tab from the Project settings page, click on the process model associated with your team project.
Important: You cannot modify the base process models built into Azure DevOps. If you are using a base process model such as Scrum, Agile, or Basic — you will need to switch to using a custom process that inherits from a base process. This will allow you to modify the process details. See this tutorial if you need to change the project’s process to a new custom process.

3. Once inside your custom/editable process model definition, click on the definition object for Task.

4. Click on the New Field button in the top left corner of Layout section of this work item definition.
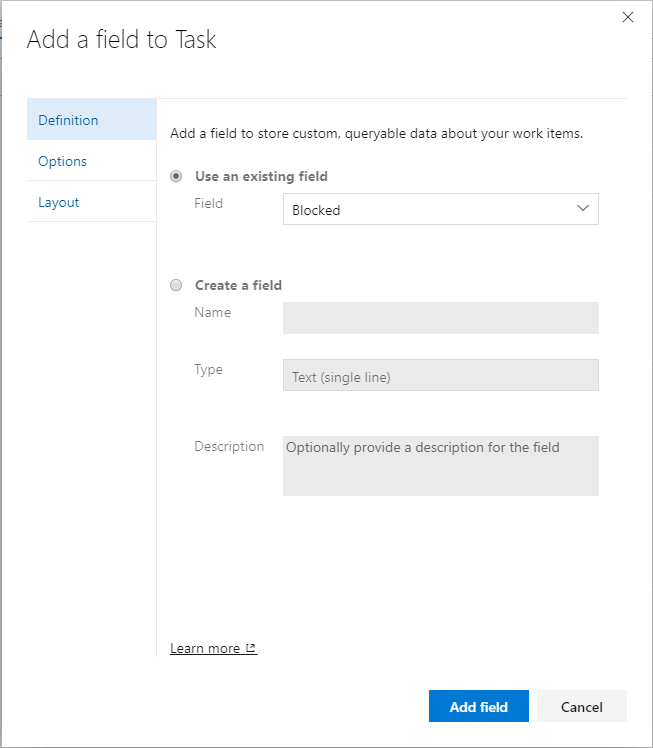
5. On the Definition tab of the Add a field to Task pop-up, select the Use an existing field drop-down and pick the Blocked field. We don’t have to make a new blocked field because Azure DevOps already supports it. Also under the Options tab, select a default value of No.
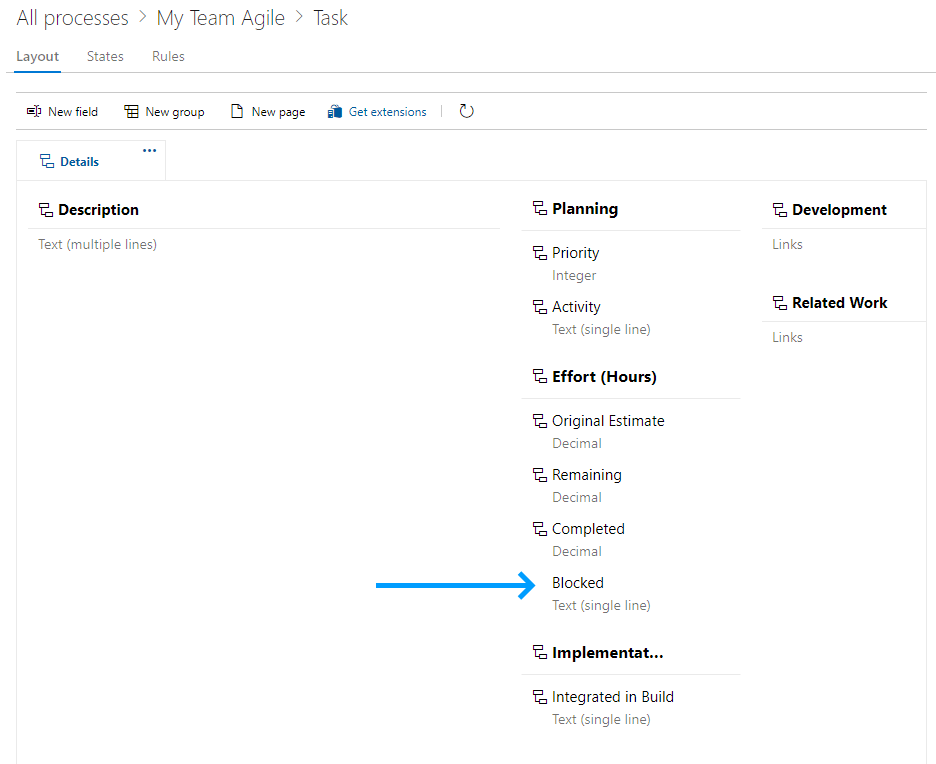
6. After adding the field, you should now see it on the work item definition’s layout. Repeat the above steps 3-5 for bugs, if you would like those to be highlighted too.
Step 2: Update the sprint board tile card styles
Now that our Task work item type supports a blocked field, we need to add the style changes to the sprint board’s tile cards.
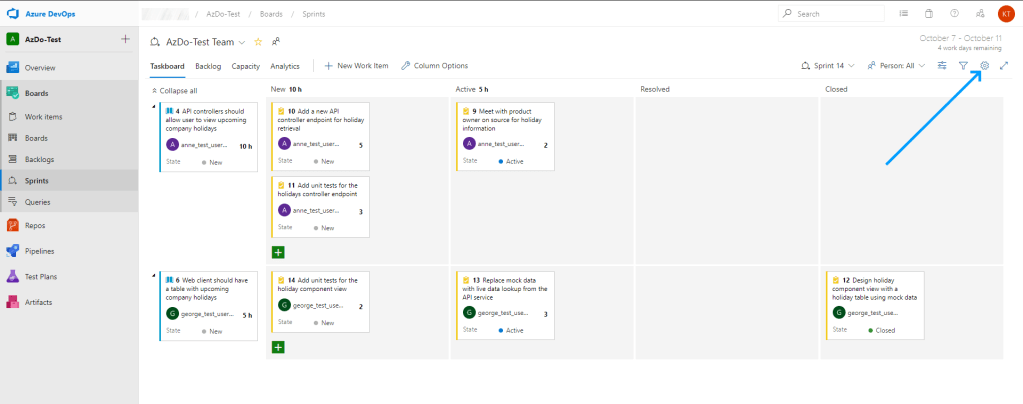
1. Click on the gear icon in the top right of your sprint board to view the sprint board settings.
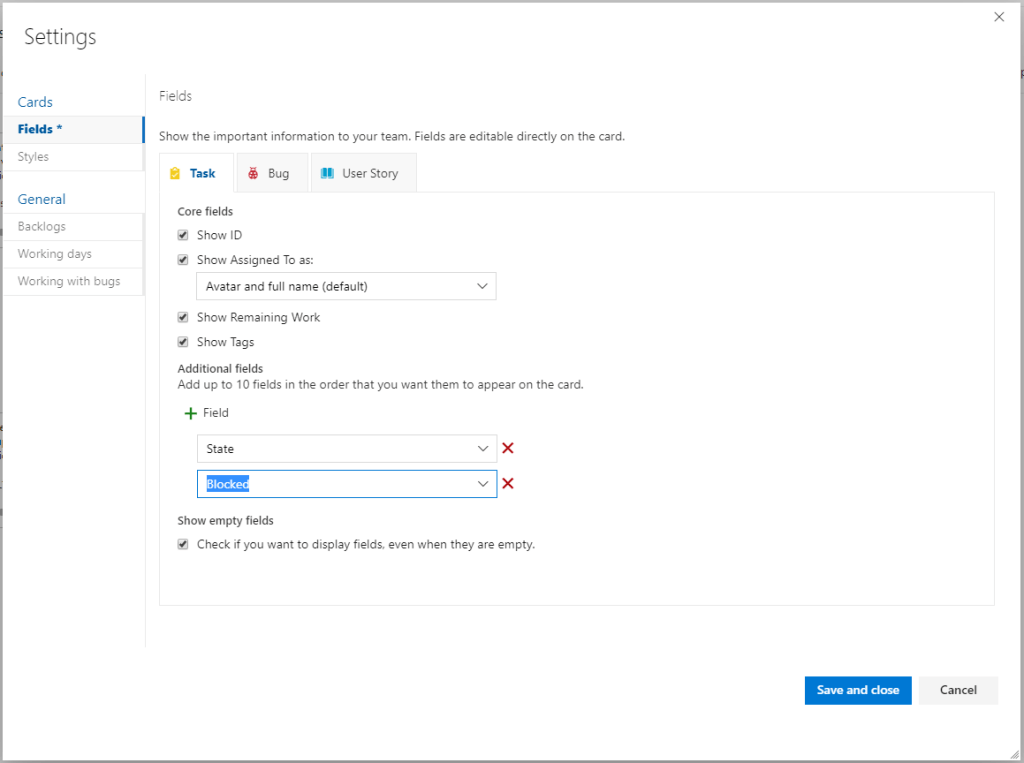
2. In the Task section, under the Fields tab, click on the “+ Field” button under Additional fields. Our new Blocked field should now be available in the drop-down menu for fields to display. Ensure this is added here. Repeat the process on the Bug tab if you have also added the Blocked field to the Bug work item type.
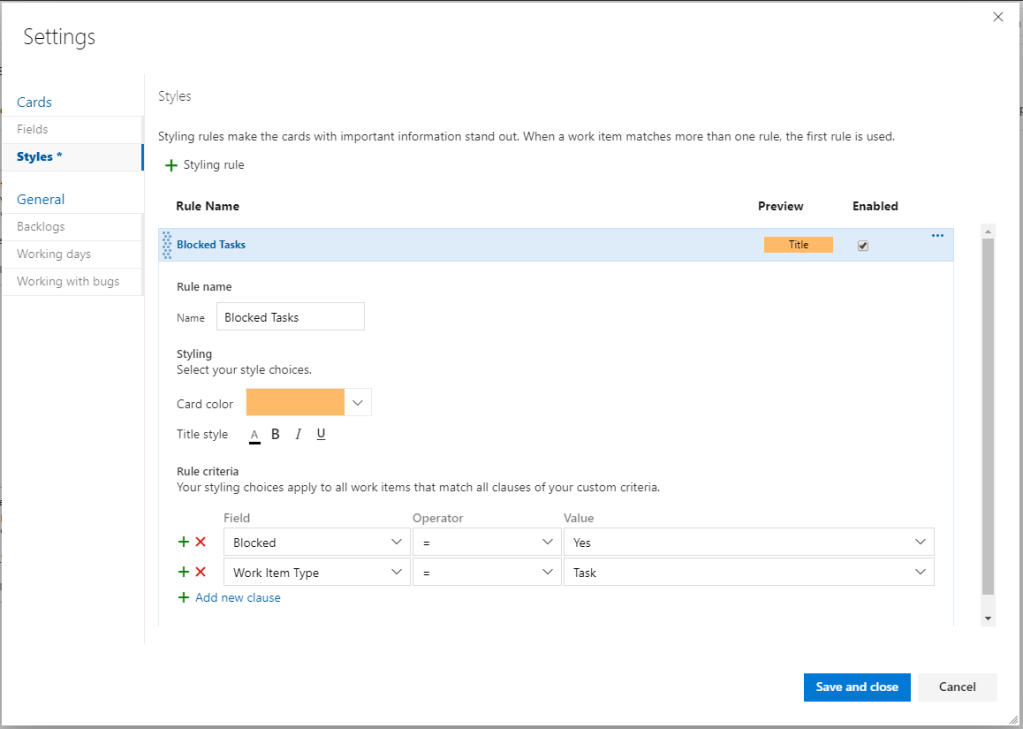
3. Move next to the Styles tab. Add a new styling rule. I named my rule Blocked Tasks, and added the rule criteria as follows: Blocked (Field) = Yes, Work Item Type = Task. Then added a card color of orange.
Tip: If you are also styling bugs– you will end up creating two styling rules. One rule for bugs, one rule for tasks. This is why the rule criteria should specify that that the style should only apply to that particular work item type (a task or bug). Doing this will provide the granularity to visualize blocked Tasks as orange, and blocked Bugs as dark red, for example.
4. Save the newly created rules and refresh the page (if it doesn’t refresh automatically).
Final result
We now can directly toggle a task as blocked or not blocked on the sprint board, and if a task is blocked it will be visually highlighted in orange. Pretty cool stuff!


We just use a tag named “Blocked” to achieve the same thing with colors and all (running on-premise). You can probably do more with a new field, but the tag fulfills our needs. I am also inherently opposed to adding fields, but maybe I’m just old. 🙂
LikeLiked by 1 person
Good point also, but I think that creating a new state you allows you to easily create specific dashboards and reports for blocked tasks.
LikeLiked by 1 person
I use a tag too, but then I have an Azure Function monitor the change feed and have it push the parent items (user stories, features, etc) into a “Blocked” swim lane so also the stakeholders know that there are blocked items.
LikeLiked by 1 person
I’m not sure it exists or not so apologies but the other function that would be nice here is to link a ticket as “Blocked By” or in the ticket that is the blocker, you can choose “Blocks” so we can associate the reason why the ticket is blocked.
LikeLike
Hi Erick– great question. I don’t know of any built in field that would cover this well. How I handle this on my team is that whenever I have a blocker, I try to add a comment in the work item discussion area that says “I’m blocked on work item #123456” or something similar. By using the hashtag and referencing another work item number, it automatically adds a link in the ‘related’ link section.
LikeLike
We use the Predecessor link-type to indicate that the Blocking item needs to be done first. You can query by link type and see a tree of what is Blocked, and what is blocking it.
I wish ADO had a link-type called Blocked By, but Predecessor will do the job.
LikeLike
i think this is what you are looking for…equivalent ADO link types (imo blocked/blockedby is easier to think about):
blocking == Successor
blocked by == Predecessor
documentation:
https://learn.microsoft.com/en-us/azure/devops/boards/queries/link-type-reference?view=azure-devops
i wish there was a style i could add like: “highlight in red when # of non-closed predecessors is non-zero”
LikeLike
I love this – and adding the blocked field to the card works, but for some reason the card doesn’t change colour. I’ve tried creating a few other rules (e.g. assigned to me) but the card remains resolutely grey. Has anyone else experienced / overcome this?
LikeLike
Just follow step 2: Update the sprint board tile card styles
LikeLike