A couple years back I wrote a tutorial on how to highlight blocked work items on an Azure DevOps sprint board (here). This post is a similar walkthrough but describes the process for overdue and due soon work items.
Providing a visual highlight for these items is a great way for the development team and product owners to quickly see which work is considered time sensitive and potentially overdue.
Note: These changes do not require any extensions, but they do require project collection administrator access rights to complete.
When should I use a due-date field?
Due date is one of the predefined field types in Azure DevOps that you can add to work item templates. Once you have added this field to a work item template (like stories, tasks, bugs, etc), I would suggest only entering due dates on work items that have hard deadlines. Setting and managing due dates for every single work item takes too much overhead otherwise.
In this tutorial we will leave it as an optional field and only set the due date on a work item that has a real-world due date. For example a work item for rotating a TLS/SSL certificate on a web server that expires soon.
Part 1: Add the due-date field to your work item templates
1. Find your project level settings. In the project sidebar in Azure DevOps, it can be found at the very bottom as Project settings with a little gear icon
2. On the Overview tab from the Project settings page, click on the process model associated with your team project.
Important: You cannot modify the base process models built into Azure DevOps. If you are using a base process model such as Scrum, Agile, or Basic — you will need to switch to using a custom process that inherits from a base process. This will allow you to modify the process details. See this tutorial if you need to change the project’s process to a new custom process.

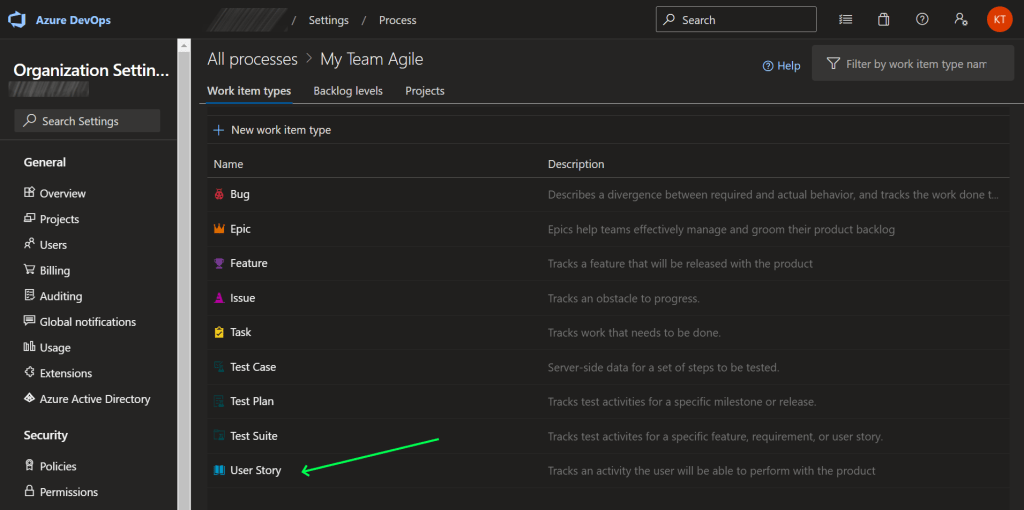
3. Once inside your custom/editable process model definition, click on the definition object for User Story.
4. Click on the New Field button in the top left corner of the Layout section of the work item definition.
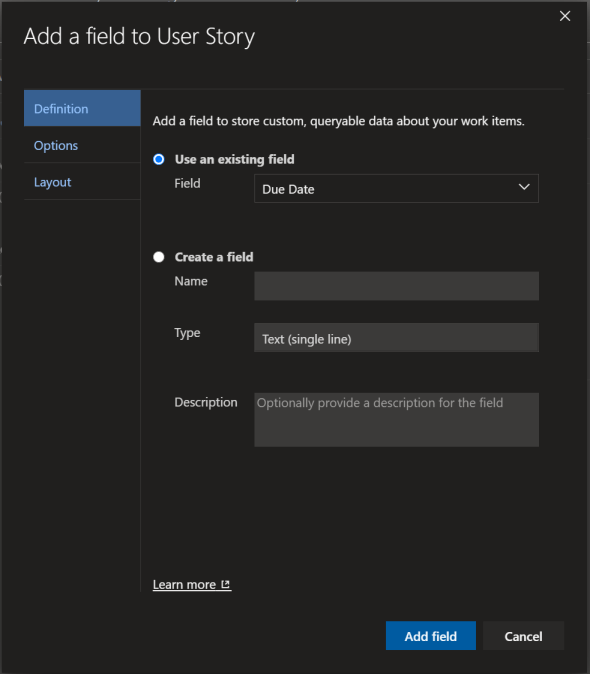
5. On the Definition tab of the Add a field to Task pop-up, select the Use an existing field drop-down and select the Due Date field. On the Options tab we will leave the defaults (field should be optional).
6. After adding the field you should see it on the work item definition’s layout. Repeat the above steps for other work item types if you want to add due dates to other items, like bugs or tasks.
Part 2: Update the sprint board tile card styles
Now that the work item templates have the Due date field, we need to add style changes to the sprint board tile cards to provide the visual highlighting effect.
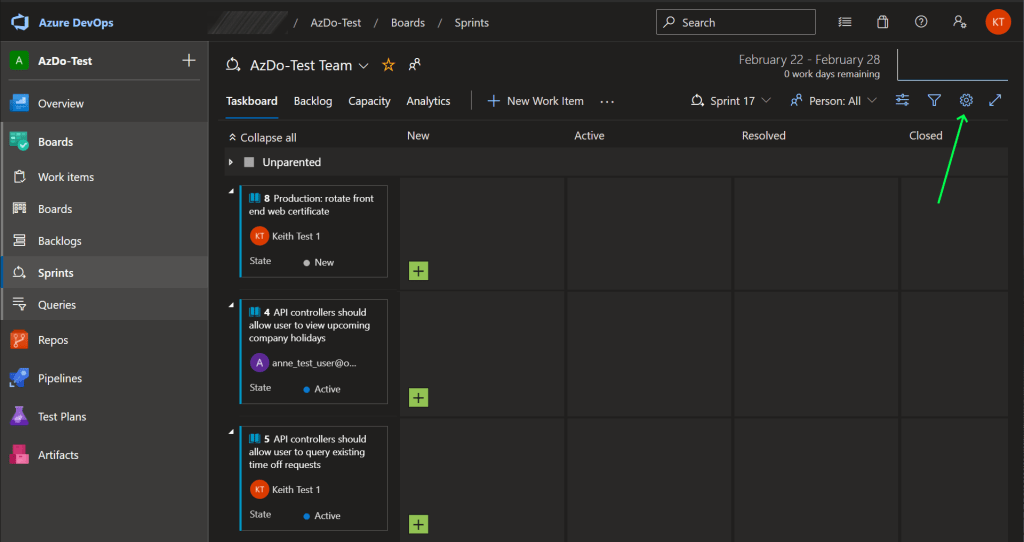
1. Click on the gear icon in the top right of your sprint board to view the sprint board settings.
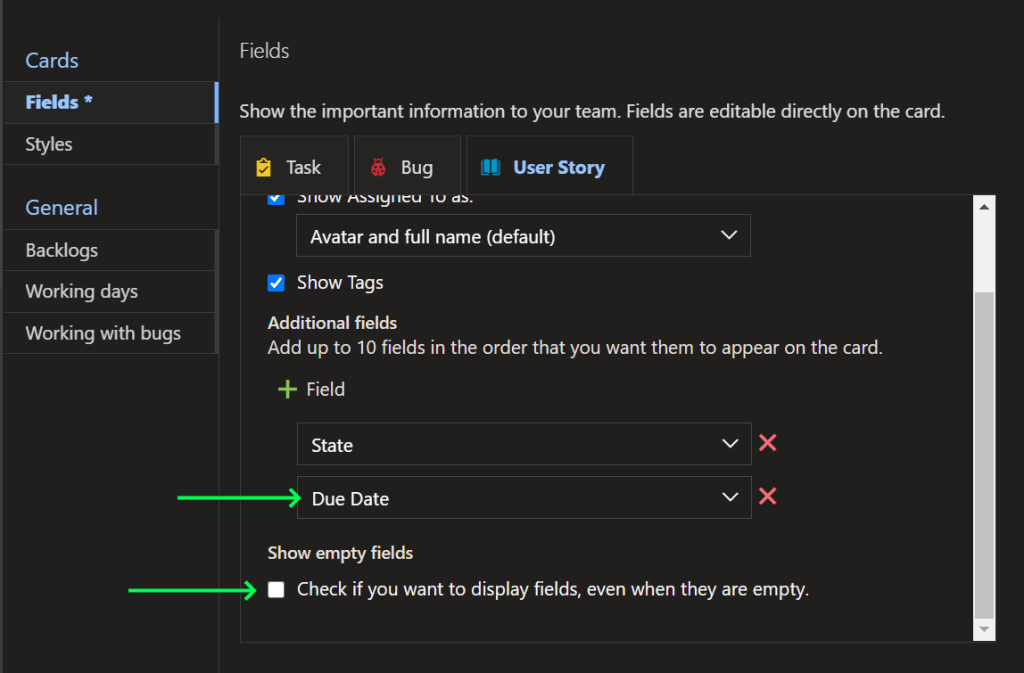
2. In the User Story section, under the Fields tab, click on the + Field button under Additional fields. Select the Due date field from the drop-down menu. I would also recommend unchecking the Show empty fields option checkbox here too. Since not all work items will have due dates, we should hide this field on the tile card when it is empty.
3. Move on to the Styles tab for the dialog window. We are going to create two styling rules here: one for overdue items, and one for items due soon.
Note: @Today is a special work item query language (WIQL) operator that represents the current date. You can use this in the rule comparisons.
Tip: If you already use tile card color rules for other purposes (like blocked work), an alternative is to style the work item title.
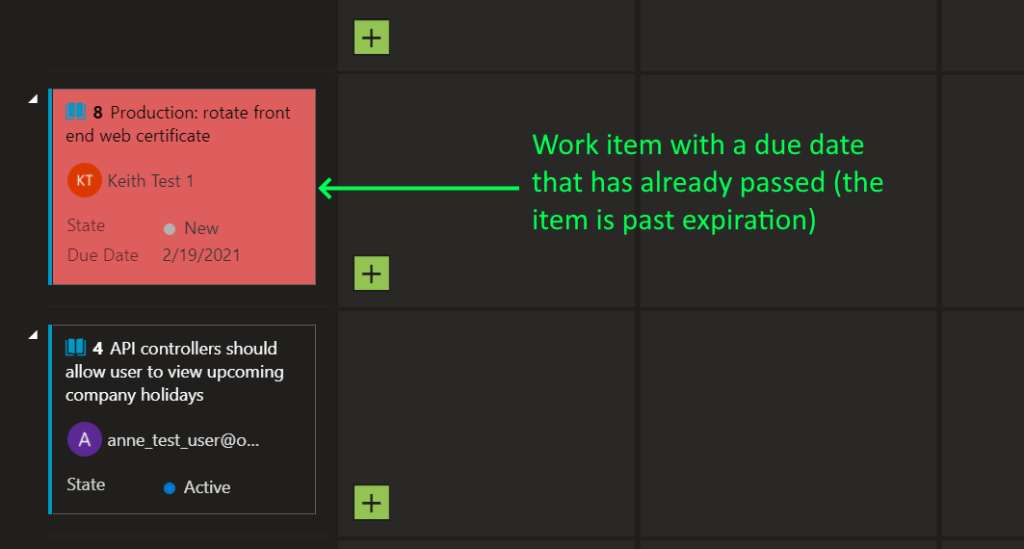
Rule name: Overdue work items
Card color: Red
Rule criteria:
1. Due Date < @Today
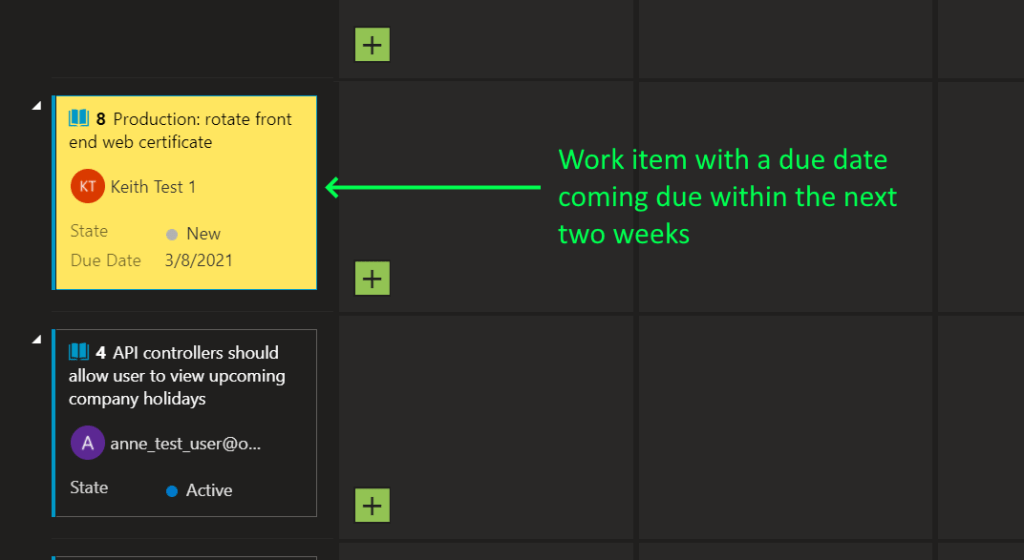
Rule name: Due-soon work items
Card color: Yellow
Rule criteria:
1. Due Date >= @Today
2. Due Date <= @Today + 14
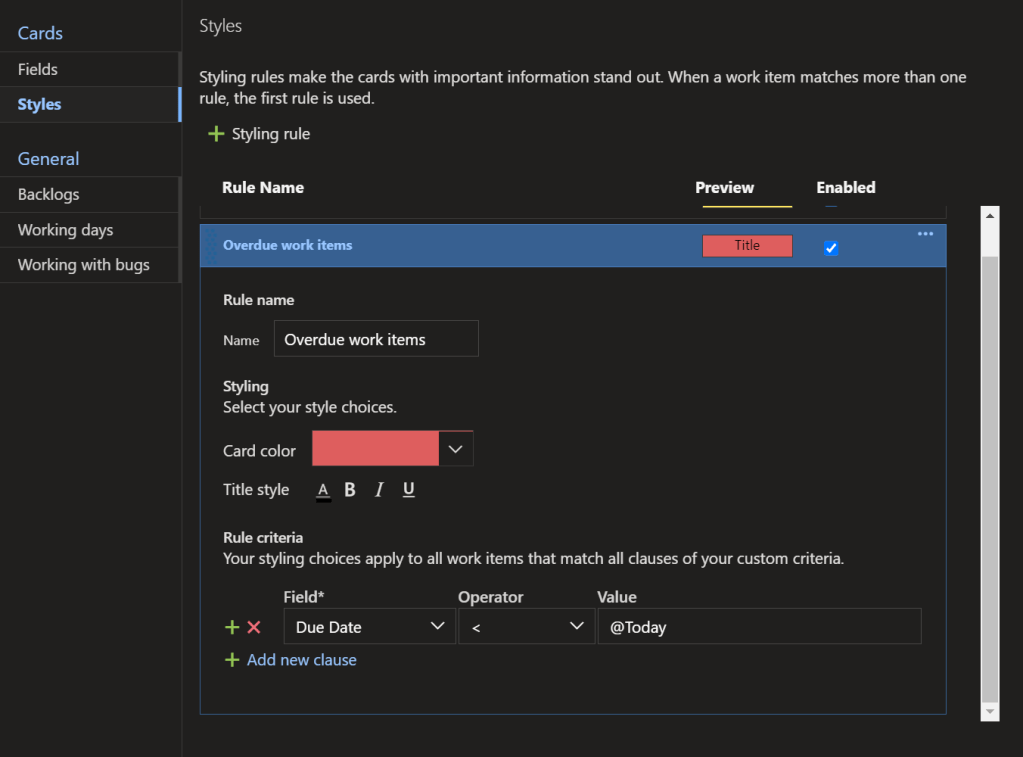

4. Save the new style settings, refresh the sprint board window, and then apply a due date to a User Story to test it out. Here is what it looks like on my screen for the different scenarios:


Hi, I have followed these instructions, however my taskboard card colours are not changing. Is there are setting I need to check for this to work please ?
LikeLike
All the changes required for color highlight are outlined in the post, so my best guess is that there is a problem with the ruleset logic you created.
LikeLike
I couldn’t find any Microsoft article that helps with this.
Thanks a lot!
LikeLiked by 1 person
Thanks! Glad you found it helpful
LikeLike
Hi, You said:
“If you already use tile card color rules for other purposes (like blocked work), an alternative is to style the work item title.”
However, I cannot find the way to change only the Title without changing the card colour. Could you please advise how to do that?
LikeLike
Are they split into separate rules? I remember it was possible to do this if you have multiple rules defined, instead of combining multiple changes (like text and color) in a single rule.
LikeLike
Very helpful article. Thanks! I want to create notification subscriptions for overdue items but unlike style rules, notifications do not support date/time operators, only Changes from, Changes to, and Changes. Do you have a suggestion for notification configuration based on the Due Date field?
LikeLike
Sorry I haven’t worked with notification subscriptions like that before, so I’m not sure how I would approach that without more research.
LikeLike
I followed the instructions and the color does change when overdue. Besides Due Date < @Today, I added State = New and State = Active, as I want it to be color overdue only when it is not close. However, when it goes to 'Closed' state it teh color doesn't change back normal and it remains highlighted. Why is that?
LikeLike